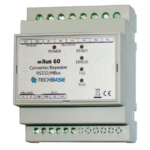
Moduino ESP32 is a compact, powerful and versatile IoT device that can be used for various industrial automation and control applications. One of the communication protocols it supports is the M-Bus (Meter-Bus) protocol. This protocol is used for communication between energy meters, heat cost allocators and other devices in the energy management and building automation systems.
In this article, we will discuss how to use Moduino ESP32 with the M-Bus protocol using RS-232 communication.
Requirements
- Moduino ESP32
- M-Bus devices (e.g energy meters)
- RS-232 to RS-232 cable
Hardware Connections
- Connect the Moduino ESP32 to the M-Bus device using an M-Bus cable.
- Connect the Moduino ESP32 to a computer using an RS-232 to RS-232 cable.
Software Setup
- Download and install the Arduino IDE from the official website.
- Open the Arduino IDE and go to File -> Preferences.
- In the Additional Board Manager URLs field, add the following URL: https://dl.espressif.com/dl/package_esp32_index.json
- Go to Tools -> Board: -> Board Manager and search for “esp32”.
- Install the “ESP32 by Espressif Systems”.
- Go to Tools -> Board and select “ESP32 Dev Module”.
- Go to Sketch -> Include Library -> Manage Libraries.
- Search for “MBus library” and install it.
Code
- Create a new sketch in the Arduino IDE.
- Include the M-Bus library by adding the following line at the top of the sketch:
cCopy code#include <MBus.h>
- Define the M-Bus object and the serial port for communication:
scssCopy codeMBus mbus;
HardwareSerial mbusSerial(2);
- In the setup() function, initialize the serial port for communication and start the M-Bus:
scssCopy codevoid setup() {
  mbusSerial.begin(2400, SERIAL_8N1, 16, 17);
  mbus.begin(mbusSerial);
}
- In the loop() function, read the M-Bus data and print it to the serial monitor:
scssCopy codevoid loop() {
  if (mbus.available()) {
    MBusDataFrame data = mbus.read();
    Serial.println(data.toString());
  }
}
- Upload the code to the Moduino ESP32 using the Upload button in the Arduino IDE.
Conclusion
With the above steps, you have successfully set up Moduino ESP32 with the M-Bus protocol using RS-232 communication. This will allow you to communicate with M-Bus devices and receive data from them, which can be further processed for industrial automation and control applications.
Order Moduino X now: https://iiot-shop.com/product/moduino/